When playing Diablo II, you’re not fighting alone.
There’s a feature in the game where you can spend money to hire someone to fight monsters with you.
This person is called a “mercenary.”
When I first started playing, I had no idea about this.
I would hire whoever looked cool.
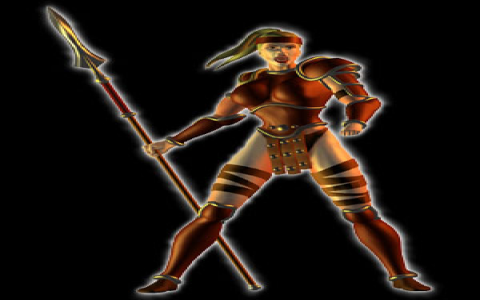
For example, there was this female archer with a bow and leather armor who looked pretty cool, so I hired her.
What happened? She could shoot arrows and help me fight monsters, but after taking just a few steps, she was knocked down by a small monster—she was instantly knocked out.
Then I had to spend gold coins to revive her.
Once, twice, three times…
In the end, I realized that I wasn’t fighting monsters and leveling up, but constantly “hiring people—dying—hiring people again.”
I spent more and more money, but my character didn’t level up much.
I finally realized: choosing the wrong mercenaries can really ruin your entire gaming experience.
Act 1: Archers look powerful, but they’re actually fragile
I first encountered mercenaries in the first act at the “Bandit Camp.”
An NPC named Kasia was standing there and said, “Do you need some help? I have archers available.”
I thought, “Sure! Ranged attacks are so safe; I don’t have to get close to the monsters.”
So I spent some money and hired a female archer to follow me into the map.
The advantages were clear:
- She stayed far away and used her bow to attack monsters;
- She started dealing damage before I even got close;
- She was pretty efficient against smaller monsters.
But the problems quickly emerged:
- She had very low health and would die almost instantly from a single hit;
- If a monster charged at her, like those fast-moving Fallen ones, she would fall instantly;
- I had to stop and spend gold coins to revive her, and sometimes she would die again as soon as she stood up.
What’s worse, reviving her once costs a lot of money.
I played for a few hours and spent nearly 100,000 gold coins just to revive her.
That money could have been used to buy better equipment, but instead it was all spent on “raising” an archer who couldn’t survive for more than three seconds.
Conclusion: It looks good, but it’s not practical. Unless you’re specifically playing a ranged class, don’t choose her.
Act 2: Four types of mercenaries, each with their own unique abilities
In Act 2, at the gates of Rut Golein, I saw a man named Grez who offered four different types of mercenaries.
They are all “Desert Guards,” but each one provides a different ‘aura’ effect to the team.
What is an “aura”?
It’s an effect that automatically boosts your abilities and those of your summoned creatures when they stand next to you, such as attacking faster, being harder to hit, or regenerating mana faster.
I tried each one:
- Offensive (Thrust Aura)
He increases the damage of your “thrust-type skills.”
I was using a javelin Amazon at the time, and it felt like a good fit.
However, he also has issues: while he can help me fight monsters, he dies too easily.
Plus, he can’t attack from a distance and has to charge in, often getting surrounded and overwhelmed. - Defensive (Resistance Aura)
This aura makes you and your teammates harder to hit by monsters.
I tried it with a Necromancer and found it very useful.
Since my skeleton soldiers are already fragile, this aura lets them survive longer and deal damage for longer.
The downside is that he attacks monsters slowly and relies on you for damage output. - Combat-Type (Combat System Aura)
This aura allows you to heal faster.
It’s suitable for classes that frequently take damage, such as melee barbarians.
However, I found that even with faster healing, it’s still hard to withstand constant attacks, so its practicality is average. - Powerful (Powerful Aura)
This is the most powerful! It significantly boosts your damage and your teammates’ damage.
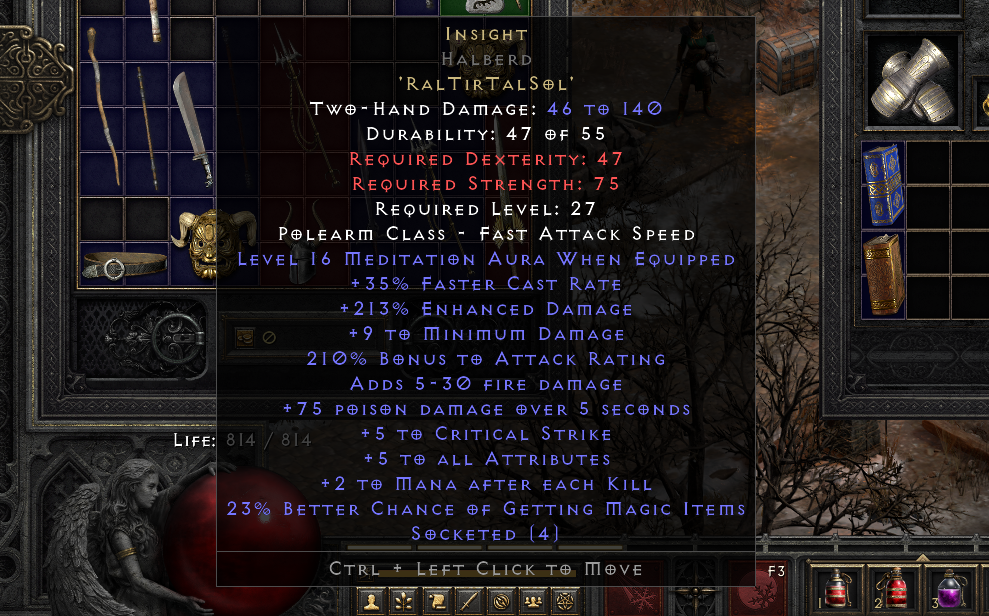
I later used it with an Ice Mage (Frost Dominion Witch) paired with a long-handled weapon called “Insight,” and the effect was explosive.
Not only did I deal damage quickly, but my mercenaries also became incredibly strong and could even help me restore mana.
So the mercenaries in Act 2 are truly “god-tier” in existence.
The key is: you must choose the right aura based on your class.
Act 3: Iron Wolf? Sounds cool, but it’s not good
When you reach Kuras Dock in Act 3, there are also mercenaries called “Iron Wolves.”
They are spellcasters who cast fireballs or ice arrows.
I thought, “Wow, mercenaries who can cast spells? That must be even more powerful!”
So I spent gold coins to hire a fire-based Iron Wolf.
The result was disappointing:
- They’re decent against small enemies in the early game;
- But in the mid to late game, their damage output can’t keep up;
- Enemies with high health take forever to kill;
- Plus, they’re as fragile as archers—one hit and they’re dead;
- What’s worse, they don’t automatically pick up items and won’t follow you too far.
I tried a few times and finally gave up.
Later, I looked it up and found out that iron wolves are basically useless in the late game, and many people skip hiring them altogether.
Act 5: Barbarians are strong but not very smart
In Act 5, in Harrogath, there is an NPC named Ashlar who can hire “barbarian mercenaries.”
This guy is big, wields a giant sword, and looks very fierce.
I hired one and found that he was indeed very tough.
He has a lot of health and high defense, so he’s perfect for standing in front as a meat shield.
But the problem lies in his “AI” — that is, the way the computer controls him.
He often:
- Stops moving suddenly while fighting;
- Gets stuck in a corner and doesn’t come out no matter how much you shout;
- Ignore the monsters right in front of him and run after a distant one;
- Sometimes even block my skill casts.
The most annoying part is that he has no buff effects.
Unlike the mercenaries in the second act, who can boost your damage or restore mana.
He’s just a “moving wall”—good for nothing but blocking enemies.
If you like to control everything yourself, then he might be okay.
But if you’re counting on him to automatically fight alongside you, you’ll be so frustrated you’ll want to smash your keyboard.
I finally understand: the best is the most suitable
After spending so much gold and dying so many times, I finally learned this lesson:
| Mercenary | Suitable for | Not suitable for |
|---|---|---|
| Act 1 Archer | Ranged class, early game transition | Mid-to-late game, people who don’t want hassle |
| Act 2 Desert Guardian | Everyone! Especially mages and summoners | Players who don’t need aura bonuses |
| Act 3 Iron Wolf | No one | Late-game players |
| Act 5 Barbarians | Those who like meat shields and can operate manually | Those who want to save themselves the trouble |
The most recommended is still Act 2 Mercenaries.
As long as you choose the right aura and give him a good weapon (such as the “Insight” rune), he can become a super helper.
For example:
- Playing Ice Mage? Choose “Powerful Aura” to double damage;
- Playing Necromancer? Choose “Resistance Aura” to keep skeletons alive longer;
- Getting hit often? Choose “Battle Stamina” for faster healing.
What’s more, the mercenaries in Act II can wear equipment!
Give them good armor and weapons, and they can go from “minions” to “war gods.”
Conclusion: Don’t just look at how cool they are, look at how useful they are
I finally get it:
In Diablo II, mercenaries aren’t just decorations—they’re your battle companions.
Choose well, and they’ll help you breeze through the game;
choose poorly, and you might end up wasting both money and time.
So stop hiring them on a whim.
Think it through first:
- What class are you playing?
- Do you need more damage? Or more safety?
- Do you want him to fight for you, or buff you?
Then go back to Act II, find a suitable Desert Guard, give him good gear, and have him fight alongside you all the way to Hell difficulty.
That’s the true “cost-effective” playstyle.
I learned this lesson the hard way with real money, so I hope you can avoid some of the pitfalls.