Alright folks, grabbed myself that new attic ladder kit last weekend because honestly, crawling up through that tiny hatch on my belly was getting real old. Figured I’d knock it out quick. Boy, was I in for a surprise. Let me walk you through this mess.
Getting Started: The Heavy Lift
First off, hauling the darn ladder kit up the stairs nearly killed me. Thing weighs a ton. Dropped it right in the hallway, cardboard box already lookin’ sad. Unpacked everything – two metal rails, a bunch of wood steps, hinges, screws, you name it. Parts were all over the place. Instructions? Felt like deciphering hieroglyphs.
Attic Prep Work: Dust & Frustration
Climbed up into the attic, flashlights taped to my head like some kinda cave explorer. Dust bunnies big enough to ride. Had to shove old boxes aside to even see the hatch opening. Laid the ladder rails up there roughly where they needed to go. Measured like the poorly drawn manual said. Marked where the hinges would mount on the attic floor joists. Easy part, thought I was cruising.
The Hole Drama: Measure Twice, Cut Once? Nope.
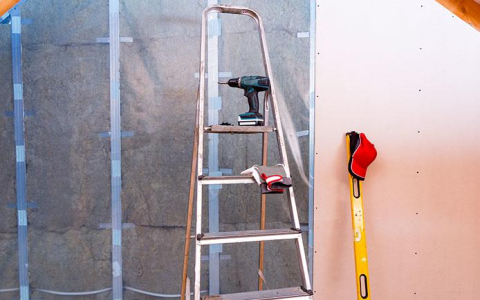
Back downstairs. Time to cut the ceiling plasterboard to fit the frame. Measured the opening again. Got the Ryobi jigsaw ready. Made my first cut. Cool. Second cut? Saw jumped a little. Ended up with one side maybe… an inch wider? Sweat dripping in my eyes. Stupid safety glasses fogging up. Threw ’em off for a sec, instantly regretted it – plaster dust stung like crazy. Had to patch that gap later. Dumb.

Screwin’ Things Up (Literally)
Okay, lifted the frame assembly up into the hole. Felt wobbly. Needed my neighbor’s kid to help hold it steady. Tried driving the first screw into the joist with my drill. Drill bit snapped. Swore under my breath. Grabbed another. Felt like screwing into concrete. Finally got it snug after what felt like forever. Did this for every single mount point, shoulders burning.
Attaching the Beast
Now for the ladder sections. Bolted the hinges onto the main frame first. Then, hooked the ladder rails onto those hinges. This part was actually kinda smooth. Pulled the ladder down carefully. Took forever to unfold it correctly without pinching my fingers. Nearly lost a fingertip trying to connect the locking arms. They sprung back like a mousetrap!
Final Adjustments & Victory
The moment of truth. Pulled the ladder down fully. Wobbled all over the place. Adjusted the little feet at the bottom, turning ’em until it sat flat on the hallway carpet. Still felt… springy? Messed with the tension straps up top a bit more. Took it down and up maybe five times. Finally… it unfolded smooth like butter and felt solid. Stood on the first step. Held my breath. Didn’t collapse! Actual victory dance ensued.
What I Learned
Quick? Took me most of the Saturday. Easy? Nope. Here’s the truth:
- Prep the space like crazy. Clear EVERYTHING.
- That instruction sheet? Read it twice, then expect to ignore it.
- Metal parts are sharp. Wear real gloves, not those cheap cotton ones.
- Cutting plaster? Go slow. Patience is key, or you patch mistakes later.
- Drill pilot holes into those joists. Save yourself snapped bits and rage.
Would I do it again? Yeah, actually. Now that I know the pitfalls. But next time? Maybe I just hire a guy. Finished ladder looks pretty darn pro though, I won’t lie. Kid could do it… eventually.