The Great Wall of Annoying Damage and My Frustration
You know, for the longest time, I ran away from the Heavy Armor Master feat in Baldur’s Gate 3. I mean, come on, three measly damage reduction points? That sounds like something you pick up when you’ve already grabbed everything else and still have a slot left. It felt like a trap, like a cheap trick that wouldn’t actually save you when a big boss hit you for fifty damage. I was playing a basic Battle Master Fighter on my third playthrough—the one where I swore I wouldn’t reload every time a companion got knocked out—and I was getting absolutely wrecked. Not by the mind flayers or the big elemental horrors, but by the relentless chip damage.
I’m talking about the Act 1 Goblin Camp. Ten goblins hitting you for six to eight damage each. Yeah, my character had a 20 AC, so most of them missed. But the four or five who actually hit? That was still thirty or forty damage gone, often sending me scrambling for a Potion of Superior Healing or forcing Lae’zel to blow her Second Wind way too early. I’d finish a fight against a bunch of low-level scrubs and my main tank would look like he’d been dragged through a rock tumbler. It was annoying. It was an unnecessary tax on my resources.
I swear, that feeling of constant, small damage reminds me of when I first bought my house and started dealing with maintenance. It wasn’t the broken furnace that almost bankrupted me; I had insurance for that. It was the constant little things: the three-dollar lightbulb I had to replace every month, the tiny leak under the sink that meant a $50 plumber call, the $20 fine from the HOA because my grass was two millimeters too tall. Alone, they were nothing. All together? They drained my energy and my bank account faster than any single catastrophic event. That’s exactly how combat felt.
The Dumb Idea That Turned Everything Around
One evening, I was complaining to a buddy of mine, a real power-gamer who runs everything on the hardest difficulty. I told him how I was thinking about respeccing my Fighter into a Barbarian just to get the damage resistance. He just laughed at me. He said, “You’re trying to stop a hundred paper cuts with a suit of titanium armor, and you’re complaining when the paper cuts still sting.” He told me to stop being stubborn and just try the Heavy Armor Master feat.
I argued with him. “Why waste a whole feat for 3 DR? I could get Great Weapon Master or Savage Attacker!”
He just told me to think of it not as damage reduction against one big hit, but as damage elimination against ten small hits. It sounded like nonsense, but I was desperate enough to try anything that meant I didn’t have to listen to the “I need healing” chatter one more time. So, I grabbed a key that I found stashed in my camp chest and paid the Withers fee. I went through the entire respec process, dumped my ability score improvement, and instead, I clicked on the one I’d been avoiding: Heavy Armor Master. I also tacked on that +1 Strength, because why not?
This was it. My big test.
Putting the “Master” in Heavy Armor Master
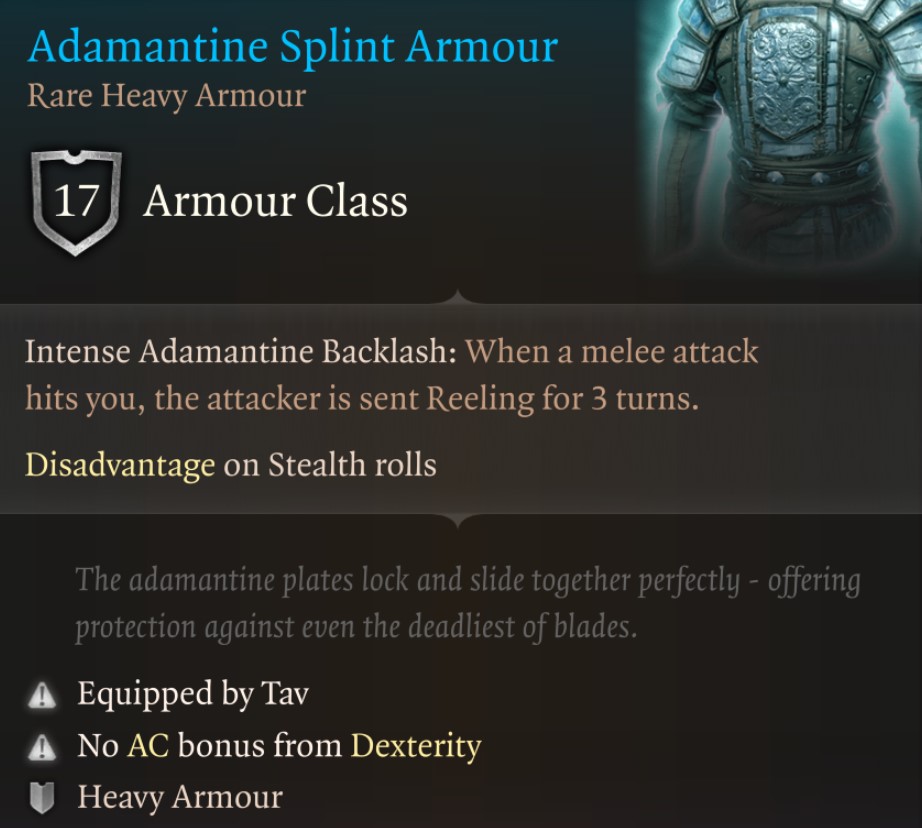
I teleported straight to the first place I knew was loaded with trash mobs: the fight with the Kuo-toa in the Underdark. Big swarm fight. Perfect testing ground. I positioned my Fighter front and center. I was wearing the classic Heavy Armor set I’d found earlier—nothing fancy, just high AC.
The first round kicked off, and those little fish people, the ones that swing those clubs and spears for tiny amounts of damage, they charged. They hit. And this is where the magic happened.
- A Kuo-toa Hunter hits for 6 Piercing damage. With HAM, it becomes 3 damage.
- A Kuo-toa Whip hits for 7 Bludgeoning damage. With HAM, it becomes 4 damage.
- A swarm of five of them hit me in the same round. Total damage taken was 3 + 4 + 3 + 4 + 3 = 17 damage.
Now, here’s the kicker. Without the feat, that same sequence would have been about 6 + 7 + 6 + 7 + 6 = 32 damage. I had basically nullified half their damage output. I was basically taking half-damage from almost all the little hits, the ones that make up 80% of the total attacks in BG3. I didn’t even use a potion that fight. I barely even felt like I needed to use my Second Wind.
This wasn’t just damage reduction; it was sustainability insurance. I could keep going, fight after fight, without feeling that drain. It freed up my Cleric to stop casting Cure Wounds and start throwing down Spirit Guardians, which is what I wanted her to do all along! My Fighter went from a guy who needed a lot of babying to an absolute rock. I realized I had been thinking about durability all wrong. I was too focused on the critical fail conditions (the single big hit) and not enough on the daily grind (the small, constant attacks).
The Final Word: Go Get It
I’ve used this trick on every heavy armor melee class since that day. Paladins? Essential. Fighters? Mandatory. Clerics running a tank build? You bet. If you can wear heavy armor, and if you plan on standing in the thick of a fight, which all good melee characters should, you need this feat. Forget the big, flashy damage boosts for a minute and focus on not being the guy who has to chug a potion after every single skirmish. You’re trading one feat slot for basically doubling your effective hit points against any group of medium-to-weak enemies. Trust me on this one. I learned the hard way, but now you don’t have to. Stop bleeding from the paper cuts, you know?